Showing posts with label Getting your home ready to sell. Show all posts

Tuesday, July 10, 2012

Curb Appeal Ideas


It's what’s outside that counts! Check out these 11 exterior upgrades that’ll give your home simple but effective curb appeal.

Your home’s curb appeal sets the tone for what potential buyers expect of the home they’re walking into, explains Darren Brand, owner and lead stager at designedtosell.ca. “Since most people’s buying decisions are based on an emotional response, the curb appeal starts the love affair, or terminates it immediately,” he says.

But you don’t have to completely overhaul the exterior of your home in order to sell. Just pick and choose what you think will have the most impact and go from there. No matter what state the economy is in, dealing with curb appeal issues are important since even in good times, you could be leaving money on the table by not doing needed work, Darren says. When times are tough, there are also a lot less potential purchasers and a lot more competition, so you have to make your home stand out in a crowd.

Darren provides 11 simple ways to improve your home’s curb appeal for maximum impact.

1 Start with the most obvious things
If you can only do a few things to spruce up the exterior of your home, start with the most glaringly obvious. For example, if your garden is overrun with weeds, the front lawn hasn’t been cut in so long that you need a machete to get to the door and remnants of last spring’s garage sale still adorn the front porch, mow the lawn, pull the weeds and get rid of the mess. A messy front yard will be the first thing a potential buyer sees and it might tell them not to look any further. You don’t have to have a prize-winning rose garden to attract potential buyers, just a yard that looks tidy and well cared for.

2 Add planters
Adding planters (even store bought, ready-made ones) can go a long way toward creating the perception of a well loved home. They not only add colour to a porch or patio, they’re eye-catching and give the impression you spend time improving your surroundings.

3 Ensure consistent window treatments
Matched blinds and curtains can add a lot to the perception of quality and thought put into a home, says Darren. “A lot of people don’t even think about how this interior element affects the look of the exterior.” He also stresses the importance of washing your windows; this is also something that has an impact on the inside as well as outside of your home.

4 Wake up your driveway
Since the driveway is one of the first things prospective buyers will notice, it’s a good idea to freshen it up. Adding a sealer can refresh a tired driveway. This is an inexpensive makeover that can be accomplished in a short time by almost anyone, Darren says.

5 Add cedar mulch Adding red cedar mulch goes a long way to freshening up flowerbeds even in early spring when plants are small or non-existent. The mulch can be any shade but Darren suggests red to add a nice punch of colour.

6 Create a welcoming porch
An empty porch can look stark and cold. If you have a porch large enough to accommodate furniture, set up a welcoming grouping such as two exterior club chairs and a table or a bistro set for dining. It’s also a good idea to add some colour with plants in containers.

7 Put down new sod
A lawn in poor condition does not create a good first impression and is something you should consider replacing if you’re trying to sell your home. It’s a lot faster to put down new sod instead of seeding and waiting, Darren says.

8 Add mature plants
When working on flowerbeds, adding larger mature plants is a lot easier (and in some cases, less expensive) than buying several flats of annuals, says Darren. Larger, more mature plants also tend to have a greater impact.

9 Spring for new accoutrements

Adding a new mailbox, house light and house number is a cheap and cheerful way of updating your home’s exterior. Big box stores like Home Depot and Rona usually stock simple yet stylish, well-priced options for these items.

10 Repaint
Giving the exterior of your home a fresh coat of paint can do wonders for curb appeal. Darren suggests painting your house in the colour of homes in a more expensive neighbourhood as a great way to create the perception of quality while doing something you probably already need to do.

11 Replace windows
Replacing windows is expensive but has a definite impact on curb appeal, says Darren. It can make your home look polished and give the impression you’ve upgraded more than just the windows.


Thanks to Style at Home for the article!

Monday, December 19, 2011

How To Prepare Your House For Sale


Prepping and staging a house. Every seller wants her home to sell fast and bring top dollar. Does that sound good to you? Well, it's not luck that makes that happen. It's careful planning and knowing how to professionally spruce up your home that will send home buyers scurrying for their checkbooks. Here is how to prep a house and turn it into an irresistible and marketable home.
 
Here's How:
Disassociate Yourself With Your Home.
  • Say to yourself, "This is not my home; it is a house -- a product to be sold much like a box of cereal on the grocery store shelf.
  • Make the mental decision to "let go" of your emotions and focus on the fact that soon this house will no longer be yours.
  • Picture yourself handing over the keys and envelopes containing appliance warranties to the new owners!
  • Say goodbye to every room.
  • Don't look backwards -- look toward the future.

De-Personalize.
Pack up those personal photographs and family heirlooms. Buyers can't see past personal artifacts, and you don't want them to be distracted. You want buyers to imagine their own photos on the walls, and they can't do that if yours are there! You don't want to make any buyer ask, "I wonder what kind of people live in this home?" You want buyers to say, "I can see myself living here."
 
De-Clutter!
People collect an amazing quantity of junk. Consider this: if you haven't used it in over a year, you probably don't need it.
  • If you don't need it, why not donate it or throw it away?
  • Remove all books from bookcases.
  • Pack up those knickknacks.
  • Clean off everything on kitchen counters.
  • Put essential items used daily in a small box that can be stored in a closet when not in use.
  • Think of this process as a head-start on the packing you will eventually need to do anyway. 

Rearrange Bedroom Closets and Kitchen Cabinets.
Buyers love to snoop and will open closet and cabinet doors. Think of the message it sends if items fall out! Now imagine what a buyer believes about you if she sees everything organized. It says you probably take good care of the rest of the house as well. This means:
  • Alphabetize spice jars.
  • Neatly stack dishes.
  • Turn coffee cup handles facing the same way.
  • Hang shirts together, buttoned and facing the same direction.
  • Line up shoes.

Rent a Storage Unit.
Almost every home shows better with less furniture. Remove pieces of furniture that block or hamper paths and walkways and put them in storage. Since your bookcases are now empty, store them. Remove extra leaves from your dining room table to make the room appear larger. Leave just enough furniture in each room to showcase the room's purpose and plenty of room to move around. You don't want buyers scratching their heads and saying, "What is this room used for?"

Remove/Replace Favorite Items.
If you want to take window coverings, built-in appliances or fixtures with you, remove them now. If the chandelier in the dining room once belonged to your great grandmother, take it down. If a buyer never sees it, she won't want it. Once you tell a buyer she can't have an item, she will covet it, and it could blow your deal. Pack those items and replace them, if necessary.
 
Make Minor Repairs
  • Replace cracked floor or counter tiles.
  • Patch holes in walls.
  • Fix leaky faucets.
  • Fix doors that don't close properly and kitchen drawers that jam.
  • Consider painting your walls neutral colors, especially if you have grown accustomed to purple or pink walls.
    (Don't give buyers any reason to remember your home as "the house with the orange bathroom.")
  • Replace burned-out light bulbs.
  • If you've considered replacing a worn bedspread, do so now!

Make the House Sparkle!
  • Wash windows inside and out.
  • Rent a pressure washer and spray down sidewalks and exterior.
  • Clean out cobwebs.
  • Re-caulk tubs, showers and sinks.
  • Polish chrome faucets and mirrors.
  • Clean out the refrigerator.
  • Vacuum daily.
  • Wax floors.
  • Dust furniture, ceiling fan blades and light fixtures.
  • Bleach dingy grout.
  • Replace worn rugs.
  • Hang up fresh towels.
  • Bathroom towels look great fastened with ribbon and bows.
  • Clean and air out any musty smelling areas. Odors are a no-no.

Scrutinize.
  • Go outside and open your front door. Stand there. Do you want to go inside? Does the house welcome you?
  • Linger in the doorway of every single room and imagine how your house will look to a buyer.
  • Examine carefully how furniture is arranged and move pieces around until it makes sense.
  • Make sure window coverings hang level.
  • Tune in to the room's statement and its emotional pull. Does it have impact and pizzazz?
  • Does it look like nobody lives in this house? You're almost finished.

Check Curb Appeal.
If a buyer won't get out of her agent's car because she doesn't like the exterior of your home, you'll never get her inside.
  • Keep the sidewalks cleared.
  • Mow the lawn.
  • Paint faded window trim.
  • Plant yellow flowers or group flower pots together. Yellow evokes a buying emotion. Marigolds are inexpensive.
  • Trim your bushes.
  • Make sure visitors can clearly read your house number.

Monday, December 12, 2011

How to Improve Curb Appeal

Home Selling Advice to Help You Attract Potential Buyers

A large percentage of home buyers decide whether or not to look inside a house or take it seriously based on its curb appeal—the view they see when they drive by or arrive for a showing. You can help make sure they want to come inside your house by spending some time working on the its exterior appearance. It's difficult to look at our own house in the same way that potential home buyers do, because when we become accustomed to the way something looks and functions, we can't see its faults. Decide right now to stop thinking of the property as a home. It's a house—a commodity you want to sell for the highest dollar possible.

Curb Appeal Exercise

The next time you come home, stop across the street or far enough down the driveway to get a good view of the house and its surroundings.
  1. What is your first impression of the house and yard area?
  2. What are the best exterior features of the house or lot? How can you enhance them?
  3. What are the worst exterior features of the house or lot? How can you minimize or improve them?
Park where a potential buyer would and walk towards the house, looking around you as if it were your first visit. Is the approach clean and tidy? What could you do to make it more attractive?
Take photos of the home's exterior. If you have a digital camera, view the color versions first, then remove the color and look at it in black and white, because it's easier to see problems when color isn't around to affect our senses.
Make a list of the problem areas you discovered. Tackle clean up and repair chores first, then put some time into projects that make the grounds more attractive.

  • Kill mold and mildew on the house, sidewalks, roof, or driveway.
  • Stow away unnecessary garden implements and tools.
  • Clean windows and gutters.
  • Pressure wash dirty siding and dingy decks.
  • Edge sidewalks and remove vegetation growing between concrete or bricks.
  • Mow the lawn. Get rid of weeds.
  • Rake and dispose of leaves, even if your lot is wooded.
  • Trim tree limbs that are near or touching the home's roof.

Don't Forget the Rear View

Buyers doing a drive by will try their best to see your back yard. If it's visible from another street or from someone's driveway, include it in your curb appeal efforts.

Evening Curb Appeal

Do your curb appeal exercise again at dusk, because it isn't unusual for potential buyers to drive by houses in the evening.
One quick way to improve evening curb appeal is with lighting:

  • String low voltage lighting along your driveway, sidewalks, and near important landscaping elements.
  • Add a decorative street lamp or an attractive light fixture to a front porch.
  • Make sure lighting that's visible through front doors and windows enhances the home's appearance.

Landscaping Decisions

There are times that adding elements to your landscaping can improve curb appeal, but there are other times when removing something is even more effective.
For example, we had a listing for a large brick house with large white columns. Tall evergreens, planted in front of each column, had grown taller than the roof. They obscured the columns and windows and made it difficult to see the front of the house.
We suggested that the owner remove them. She trimmed them back, but it didn't do the trick—they were unattractive and still kept potential buyers from seeing the true character of the house.
I sold the house to a couple who could see past the trees. One of their first tasks after closing was to yank them out of the ground, instantly boosting the home's curb appeal.
Most buyers cannot visualize changes, and often won't take a second look at a house if the first look doesn't appeal to them. Home buyers who can visualize changes, and are prepared to make them, expect you to reduce the price of the house to compensate for the work they plan to do.

A Few Curb Appeal Tips


  • If you can budget it, a fresh paint job does wonders for a dingy house. Drive around your town to find color schemes that are appealing.
  • Install a more attractive front door, maybe something with leaded glass inserts.
  • If you can't justify the cost of a new door, consider replacing plain doorknob hardware with something more attractive.
  • If new hardware is beyond your budget, repaint or stain the door and polish the hardware?
If you brainstorm, you'll find that there's a solution to most problems—one that lets you stay within your budget. The trick is to find the areas where improvements are needed, then work on them as best you can.

Friday, September 09, 2011

Curb Appeal your home this fall

Who doesn't love a good deal? Home Depot is offering Buy One Get One free on fall Mums.

The offer runs September 9th through September 14th and remember to print off this coupon.

If you are thinking of adding some colour to your porch or garden, this is a good deal. Enjoy!

Monday, April 25, 2011

Decorating Tricks to Make a Small Space Look Larger

Lots of people live in a small home, a small room, or just a small space. Some people live in a small apartment because that's all they can afford, and they're grateful for it.


Some people live in a small apartment or home because they're tired of taking care of a larger place and want to "downsize."
Others just don't want a large home. Small is beautiful! And easy, and practical, too!

But no matter what your reason for living in a small space, you'll undoubtedly have to make some compromises in your decorating, get really organized, and make some adjustments to your lifestyle in order to make everything fit and not feel cramped.

If you're looking for a cozy, intimate space, you're in luck. By using soft, snuggly upholstered pieces, dark, warm tones, and dramatic lighting, your tiny corner can become a wonderful private space.
But if you really feel the need to stretch out in your small space, you can make some decorating changes to make the area look and feel larger without moving any walls! With color, furniture arranging, and interesting lighting, your space won't feel so cramped.
See if some of our tips will work for your small space.

•Clear Out the Clutter

There's nothing that makes a small space feel cramped more than having too much stuff. Work out ways to get collections out of view, organized behind doors, table skirts, or on shelves. With things neatly arranged and out of sight, the space that is in view will feel orderly and open.

•Open the Way

With furniture and accessories blocking the view into a room and out to open spaces, a room will look cramped. By moving furniture out and away from walkways, you'll open up the space and make it feel larger. You can also choose short pieces of furniture like an ottoman, an armless, open chair, or a low table, and place large, tall pieces along a wall rather than out in the open space. If you can see the floor, the room will look larger.

•Chooser Soft, Light Hues

Whereas dark, warm colors make a space feel cozy and intimate, light, cool colors make a space feel open and airy. For optimum effect, select soft tones of blues and greens.

•Use a Monochromatic Color Scheme

Choose colors that are in the same color family and use tone-on-tone woven upholstery fabrics, textured wall finishes, delicate tonal drapery fabrics. Cool colors and delicate warm colors on most surfaces give the room a more open look.

•Coordinate Wall and Furniture Colors

Contrasting colors tend to break up a space. Pieces of furniture are less interrupting and tend to blend with the space if they're colored to match the wall color.

•Let in the Light

Any room will look larger if it's well-lit, either by natural light or artificial lighting. Get rid of heavy draperies and open up the windows to let the light of the outdoors into the space. Add more lamps or install track lighting or recessed lighting.
Here are some more things you can do to make a small space at least feel larger, even if the floor space stays the same.

•See-Through Space

By using materials that you can see through, anything beyond will appear farther away. For a tiny bathroom, I got rid of an opaque glass shower enclosure and substituted a clear, frameless one. The room is the same size looks bigger. Now we can see all the way (an extra 3 feet) to the wall at the back of the shower.
You can also use glass or lucite for tabletops. With a sturdy base of wood, stone, or metal, the space around the table will open up the view beyond.

•Reflective Surfaces
 
You might not like the look of a mirrored wall, but you have to admit that it always makes a room look larger. Instead, use a large framed mirror on a wall or stand an over-sized framed mirror against a wall. You'll get the same room-enlarging effect as a mirrored wall, but with more style. The space and the light will be reflected for a more open feeling.

Top a coffee table or side table with a piece of beveled plate mirror or have a chest of drawers or bureau covered with custom-cut and installed mirrors.

•Believe It or Not, Bigger Is Better!

Use a few large, simple pieces of furniture or accessories in place of several smaller pieces which would make a small space look cluttered. With open space and large blocks of color, the room will appear to be more calm and comfortable.

•Keep the Upholstery Plain

Select plain colored upholstery for furniture instead of bold plaids, stripes, or prints. Use texture for interest and stick to neutral tones if you can.

•Airy, Light Fabrics

Sheer fabrics allow light to pass through window treatments, bed skirts, table covers, and furniture slipcovers. If you want something other than plain colors, find soft floral vines or simple stripes to keep the look simple.

By following some of these simple rules about decorating a small space, your home will feel comfortable, not cramped. You'll have an intimate space that suits all your needs.

Thanks to Coral Nafie for this article

Thursday, April 21, 2011

Getting your home ready to sell: 10 painting don’ts

Painting is not as easy as it looks. Sure, any chimp can be taught how to load a brush and slap some paint on the wall, but a quality paint job requires human intelligence and at least a temporary devotion to detail. For your next painting project, be sure to steer clear of these 10 amateurish painting mistakes.

1. Don’t skimp on the prep work.

Like middle school, prep work is awful drudgery that must be completed before you can move on to better things. Indoors, the most important stuff is cleaning all surfaces, repairing damaged areas, patching where necessary, and prepping the area (see item 10, below). Outdoors, the critical prep work is removing peeling and otherwise loose paint, repairing damaged or rotted wood, and cleaning all surfaces.

2. Don’t mess with old paint unless you’re sure it’s lead-free.

Apart from curious kids eating paint chips, all of the warnings about lead paint can be realized with paint prep work: sanding or scraping lead paint makes it friable (airborne), the perfect state for getting into your body. To play it safe, if there’s any chance a surface may have been painted with lead paint, have a sample tested first.

3. Don’t paint over moisture or active mould.

Stain-blocking (and specifically mould-blocking) primers are good for preventing colour bleed-through from dark mould stains, but they’re not intended to correct a live mould problem. And they’ll only mask a moisture problem for a very short time. Since mould and moisture go together, first stop the moisture (wherever it’s coming from), then kill the mould (with detergent or diluted bleach) and let it all dry completely before priming and painting.

4. Don’t paint bare surfaces without priming first.

As much as you might resent it, primer is your friend. It sticks really well, it fills pores in raw materials and it’s less than half the price of paint. Using an extra coat of paint instead of primer is a waste of money and likely will result in a poorer finished product.

5. Don’t paint masonry on a whim.

Poured concrete, brick, stone and concrete block are among the very few building materials that can fairly be called “maintenance-free.” Painting them once changes that forever.

6. Don’t use tape (in most cases).

Pros don’t use tape for the same reasons you shouldn’t: it’s time-consuming and painstaking to apply, it usually lets paint bleed underneath its edge, and it can peel the new paint off when it’s removed. Instead of using tape in the usual places, remove anything that’s removable (like outlet covers and cabinet hardware), and take the time to “cut in” a clean line of paint along the edges of trimwork and the like.

7. Don’t use cheap paint.

Quality paint goes on better, lasts longer and has much nicer colour than lousy paint. And when you consider that you’ll be looking at the results for the next decade or so, an extra $10 or $15 is a worthwhile upgrade.

8. Don’t use cheap paintbrushes.

This goes right along with the last item. A $3 brush will never work well and should be discarded after the first job, right about the time it starts shedding bristles. A $10 brush knows how to handle paint and will become a treasured tool for years down the road.

9. Don’t paint window tracks.

Errant baseballs aside, painting the tracks where the sashes slide is perhaps the best (and dumbest) way to ruin a window. This is akin to lubricating ball bearings with caulk. For the same reason, never let paint overlap from the stop to the sash and vice versa.

10. Don’t paint over outlet and switch covers.


Being too lazy to remove electrical cover plates before painting, and merely taping off the covers, leaves a ridge along the edge that usually peels away in a large, unsightly chunk if the cover is removed later. Take the two minutes to remove the switch plate.

Thanks to Philip Schmidt of the Toronto Star for this article

Tuesday, April 12, 2011

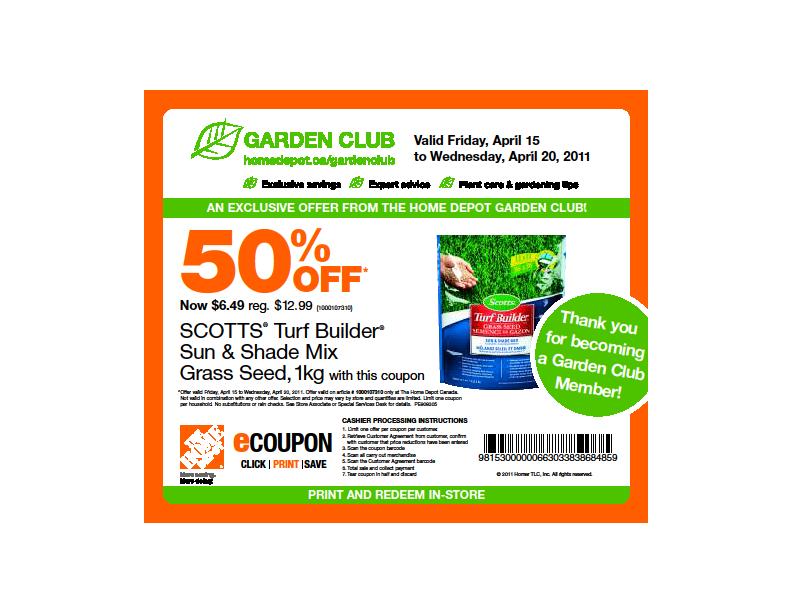
Getting your house ready to sell? Save 50% off grass seed

Getting your house ready to sell? Now is the time to start throwing down a little grass seed. Add some rain, sun and voila! A beautiful green lawn and a house with curb appeal!

Enjoy this 50% off grass seed coupon from Home Depot. Just print and remember to bring it with you!

Friday, March 25, 2011

FAQ's about when to plant flowers in Toronto


The saying April showers bring May flowers must have been coined by someone living slightly south of the Canada border. In Toronto, we can still get cold weather, even frost up until the end of May. For those of us in southern Ontario, it's May showers that bring June flowers.

With patio furniture in the stores and garden centres slowly being stocked, it's time to start thinking about planting even if it is still hopeful thinking at this time of the year.

Here are some gardening FAQ's:

I just cannot wait to get out there and garden! At what temperature is it safe for me to plant annuals?

The frost free date in Southern Ontario varies per location, but historically May 24 is the start of the safe time to plant all annuals. But cool loving annuals such as pansies can go into the garden well ahead of the 24th! Different annuals have different tolerances to cold temperatures. We like snaps, viola, dianthus, and pansies early – ahead of the warmer weather.

Every year I plant annuals — pansies, violas, lobelia, etc… they look great for the first month or two, but by mid-summer they start to fade.

Annuals often are either 'cool' or 'warm' season flowers. Pansies are the best known of annual flowers that will flower while the night temps are low, but sort of poop out when the summer heat starts. While some of the heat loving plants will not do well early in spring when it is cool, coleus, New Guinea impatiens and vinca are some well known warm plants. For a great looking annual flower bed many folks plan a 'change-out' mid summer. Plant the cool flowers early in spring, say late April, then by end of June come back in with the warm flowers.

What are the best perenial bulbs for a Toronto Garden?

Narcissus ‘Salome’, Narcissus ‘Ice Follies’, Tulipa ‘Orange Emperor', Tulipa tarda, Crocus vernus ‘Jeanne d’Arc’, Crocus tommasinianus ‘Ruby Giant’, Camassia cusickii
, Leucojum aestivum - Common names: meadow snowflake and summer snowflake, Anemone blanda ‘Blue Shades’- common name windflower, and Scilla siberica

Do you have a chemical free way to kill weeds between patio stones?

Yes! 5 min | 5 min prep | 1 Liter 4 cups white vinegar
1/4 cup salt
2 teaspoons dish detergent

Mix ingredients together and spray on the weeds- Goodbye Weeds!

You can also pour boiling water on weeds and that will also kill them. You may have to repeat both remedies but the result is environment freindly


When is the best time to plant trees?

Plant deciduous trees in the spring, as soon as the frost is out of the ground, or in the fall, from leaf-fall until freeze-up.

Evergreens can be planted early in the spring until four weeks after deciduous trees have opened their leaves or in the fall, from about the first week of August to the end of October.


Thanks to these sites for the informaiton!

http://landscapeontario.com/plant-resource-faq

http://www.treesontario.ca/programs/index.php/workbook

Wednesday, March 16, 2011

Getting your house ready to sell: A check list for home sellers


When getting your home ready to sell, you need to look at your house in a new way. Think of your house as a product about to go on the market where it is probably competing with brand new housing. It needs to show well – which means clutter-free and well kept.

Today’s homebuyers lead busy lives and may not be interested in taking on major repairs or improvements upon moving in. You need to make your house a “10”. This document will help you spot what is right and what is not so good about your "product". It will give you the opportunity to take corrective action to ensure your house looks fresh, clean and well maintained when the “For Sale” sign goes up.

Fix It First

If you need to make improvements to your home, do the work before it goes on the market. Potential buyers are not interested in hearing about your good intentions to look after defects before a transfer of ownership takes place. Even if fix-up work is underway, buyers may not be able to visualize what your home will look like when the work is finished. They will just remember it being in a state of disrepair.

Professional Inspection: Yes or No?

A serious buyer may want to have a professional home inspector check your house from top to bottom before making an offer. Even though this guide will help you identify problems on your own, the option of hiring a professional home inspector is open to you as well. If you can afford it, an inspection in advance of putting your home on the market is a good idea. It is your best way of finding and taking care of serious deficiencies before an inspector hired by a potential buyer discovers them.

CMHC's Homeowner’s Inspection Checklist

This practical, easy-to-follow guide for homeowners will help you identify common house problems and deal with them. In it, you will find illustrated how-to tips offering effective solutions for every room of your house. Use the ordering instructions on the back page of this fact sheet.

Let’s Begin Outside

Check Your House’s Curb Appeal


How does your house look from the street? That is where prospective buyers will be when they first see your home; and, that is where they will form that all-important first impression. Stand at the curb in front of your house and note what you see.

- Remove any clutter in your yard.
- Repair cracked or uneven driveway or walkway surfaces.
- If your lawn has bald spots, apply some top dressing and re-seed. Prune trees and shrubs of dead wood. Weed and mulch flower beds, if you have them. If it is the right time of year, consider buying some flower-filled planters to enhance the eye appeal of your property. Make sure your lawn is mowed regularly. Ensure that the composter area is tidy.
- Are your windows and walls clean?
- Does your front door need paint?
- Ensure your eaves and downspouts are clear of debris and in good repair.
- Are your backyard deck and walkways clean? If not, use a power washer and do any necessary painting, staining or sealing.
- If you have a swimming pool, are the deck and pool clean (when in season)?
- Do all outside lights work? Replace any burned out bulbs, and clean fixtures of dirt and cobwebs.
- Is there a shed? Does it look presentable?
- Do windows and exterior doors need recaulking? Even at 6-7 years of age, the caulking may be dried out and in need of replacement.
- Do you have decorative wooden poles on the porch? Is the wood at the bottom in good condition? Overall, does it need a new coat of paint?
- If you have a gate, is it well oiled?

When you have completed the curb appeal inspection, carefully check the rest of your home’s exterior.

Will Your Roof and Chimney Pass Inspection?

If you are uneasy about climbing onto your roof, you can inspect most items from the ground using binoculars. Otherwise, be careful when working or moving about on your roof. Unless roof repair is a simple matter of applying new caulking, you will probably need the services of a professional.

Check the general condition of your roof. Sagging sections, curled shingles, pooled water on flat roofs and corrosion on metal roofing mean it is time for repair or replacement.

Both masonry and metal chimneys need to be straight and structurally sound, have proper capping on top and watertight flashing where they penetrate the roof.

All roofs undergo stress from snow and rain loads, so a truss or rafter may become damaged, resulting in a noticeable small depression. A professional should do this inexpensive repair.


Examine Your Walls

The condition of your exterior walls directly affects the look and curb appeal of your home.

- Replace old caulking. You may have to cut or scrape away old caulking to get a good seal. Do not seal drainage or ventilation gaps.
- Is your exterior paint looking good? If you see faded colours and cracked or peeling surfaces, you need to repaint. Be sure to get competitive bids if you hire professional painters.
- You can clean vinyl siding but defects or damage to it and to metal siding usually means replacement.
- Stucco can be repaired but some skill is required to blend patches with existing stucco.

Now, Let’s Go Indoors

A prospective buyer will usually enter through your front door; so, that is where you should begin your interior inspection. You want your buyer to see a neat, clean, well-lit interior. Get clutter out of sight; ensure that carpets are clean and floors are scrubbed and polished; and that walls and trim show fresh paint (preferably neutral or light colours).

Take a sniff. Are there any unpleasant odours in your home? If so, track them down and eliminate them. Ensure all your lights work and are free of cobwebs. You want your home to look spacious, bright and fresh.

If you have considerable family memorabilia, consider thinning it out. Your objective is to help potential buyers feel as if they could live in your home. That mental leap becomes more difficult for them if your house resembles a shrine your family.

Professional realtors and decorators say the most important areas of your home to upgrade and modernize are the kitchen and bathrooms. Buyers also want to see new or recently installed floor coverings throughout.

General Interior

- Check stairs for loose boards, ripped carpeting, and missing or loose handrails and guards.
- Most problems with interior walls are cosmetic and can be repaired with spackling compound and paint.
- Ensure doors open and shut properly. Minor sticking is normal but excessive binding indicates possible structural problems.
- Open and close all windows to ensure they work properly. Fogging between the panes of a sealed window indicates the seal is broken and the unit needs to be replaced.
- Keep furniture to a minimum so rooms do not appear smaller than they are. Ensure that traffic can flow in or through rooms unimpeded. If they contain bookshelves or cabinets overflowing with books, magazines and knick-knacks, remove some of these items.
- Ensure closets look spacious, organized and uncluttered. Create space by getting rid of old clothes and junk.
- Remove or lock away valuables such as jewellery, coins, currency, cameras and compact discs.


Kitchen and Bathrooms

People splash water around in the kitchen and bathrooms so check around sinks, tubs and toilets for rotting countertops and floors. Problems could be due to poor caulking or plumbing leaks. Fogged windows, molds and sweating toilet tanks indicate high humidity levels, which you can remedy with exhaust fans.

In the kitchen, clean all appliances, including your oven. Clean or replace your greasy stove hood filter. Clean your cabinets inside and out, as well as your countertops and backsplashes. Repair dripping faucets.

Remove anything stored on top of your fridge and remove artwork and magnets.

Remove any items stored on countertops.

Remove items stored under the sink.

In bathrooms, scrub sinks, tubs and toilets, taking care to remove any rust stains. Remove mildew from showers and bathtubs. Fix dripping faucets or trickling toilets, and vacuum your fan grill.

Clean mirrors, light switch plates and cupboard handles.

Consider installing new 6-litre toilets if you currently have water-guzzlers.

If you have ceramic tile in either your kitchen or bathroom, ensure grouting is intact and clean.


Basement

The condition of the foundation and main structural members in the basement are critical to the fitness of any house. The purpose of your inspection is to make sure these are sound and durable.

Look for cracks, water seepage, efflorescence (white powder-like substance), crumbling mortar or concrete, and rotting wood. If any of these problems are present, you need to do further research to learn about causes and possible solutions.

If your basement is damp or musty, consider using a dehumidifier.

Like all other areas of your home, your basement should be organized and clutter-free.

Change the filters in the furnace and have it cleaned–this is the number one item purchasers want done after a home inspection.

If you have a pet with a litterbox, ensure the litterbox is clean.


Garage

Get rid of the broken tools, old car parts, discarded bicycles, empty paint cans and the hundreds of other useless items that accumulate in garages. Again, you want a clutter-free zone.

Use cleaning solutions to remove oil stains from the floor.

When It’s Showtime!

You have inspected your house and taken care of problems. Now you are ready for showings. You will need a plan of action that assigns duties to each family member so the place can quickly be whipped into shape.

Open all drapes, blinds, etc. and turn on lights to make the house bright.

Air out the house to get rid of cooking, pet odours, and so on.

Have fresh flowers in view.

Pick up clutter, and empty garbage.

Make sure everything is spotless.

Set your thermostat at a comfortable level.

Remove pets from the house or put them outside.

If you have an agent, leave when the house is being shown. If you are selling it yourself, you need to strike a balance between being helpful and crowding the buyer.

In poor weather, provide a place for boots, overshoes and umbrellas.

Display photos of the house in summer to show landscaping if selling in the winter months.

Leave out heating and hydro bills.

For those on a septic system and/or well, leave out inspection and maintenance information.

Monday, March 14, 2011

Getting your house ready to sell: Declutter 101


By Cynthia EwerEditor, Organized Home

Taking aim on the household clutter problem, you've resolved to work slowly and steadily, and you've carved out blocks of time to declutter. Now what? And how?

Time to consider weigh in with specific methods and strategies for decluttering. These tried-and-tested methods bring different strengths to the fight against clutter. Choose the one that's right for you and your family.

Forcing Decisions: The Four-Box Method
Clutter is evidence of many things: poor habits, lack of organization, sentimental attachment, too much stuff. But, at bottom, each item of clutter is a decision delayed. The mail arrives, replete with circulars and junk mail and catalogs. "Oh, I'll go through that later!" whispers the clutter monster, deferring the simple decision to cull and toss the unwanted paper.

The Four-Box method forces a decision, item by item. To apply it, gather three boxes and a large trash can. Label the boxes, "Put Away", "Give Away/Sell" and "Storage." Items to be thrown away belong in the trash can.

Take the four boxes to the declutter area. One at a time, pick up each piece of clutter. Ask yourself, "Do I want to put this away in another place, donate it (or sell it at a yard sale), store it, or throw it away?" You may not release your grip on the item until you have made a decision.

At the end of the decluttering session, reserve 10 to 15 minutes to empty the boxes. Put Away items are put in more appropriate places. Give Away/Sell items should be stored outside the house, in a garage, or in the trunk of the car for drop-off at a charity donation center. As each Storage box fills, make a brief inventory of the contents and put the box into the storage area. Finally, empty the trash can quickly to prevent second thoughts!

The Four Box method will work for anyone, in any declutter mode. Use it to clear a shelf or drawer each day, or apply it as part of a whole-house weekend assault on clutter. By forcing a decision, it will serve you well as you cull clutter from the home.

Out of Sight, Out of Mind: Box and Banish
Box and Banish is an alternative to the Four Box method. Where the Four Box method nibbles away at clutter bit-by-bit, Box and Banish is a drastic, clear-it-out effort that transports clutter away from living areas, to be dealt with later.

Box and Banish is simple. Gather all clutter from counters, drawers, chairs, tables, floors, ovens, and bathtubs. Place the clutter into boxes or bags, and stack it somewhere outside the living area. Work until all surfaces are clear and clutter free.

Next step: open each box or bag of clutter, one at a time. As with the Four Box method, decide whether each item inside should be thrown away, put away, given away or sold, or stored. In extreme cases, declutterers have been known to throw away Box and Banish boxes, sight unseen!

Box and Banish has one big advantage and two big disadvantages as a declutter method. On the plus side, Box and Banish creates instant results. Often, impending guests or other emergencies force a version of Box and Banish upon the cluttered household. Clearing clutter quickly sparks enthusiasm and motivation.

On the minus side, energies often flag before the Box and Banish declutterer reaches the end of the boxed clutter. The effort stalls, the clutter remains, aging gently in the bags and boxes as it becomes surrounded by new layers of clutter. In a worst-case scenario, the need for some Boxed-and-Banished item can trigger formation of Mt. Cluttermore, as the frantic searcher upends each carefully boxed hillock of clutter, looking for the single missing item.

More important, while Box and Banish can create an instant absence of apparent clutter, the method does nothing to change the underlying problem. More gradual decluttering methods go hand-in-hand with other components of getting organized: building new habits, organizing stored items, creating new household routines. Box and Banish, for many, is a mere cosmetic quick-fix.

Still, if you're fiercely motivated and determined to complete the declutter process, Box and Banish is an option that jumpstarts organization efforts with fast results.

Ellen's Penicillin Method
Often, decluttering efforts chase their tails in an endless loop. The home manager declutters the small table in the hallway and moves on. By the following week, a whole new species of clutter has returned to the cleared area.

The Penicillin method, devised by online declutterer Ellen in MN, uses a Petri dish metaphor to get a grip on clutter. Imagine a Petri dish full of fuzzy brown mold spores. A researcher begins to apply small drops of penicillin to the dish. Each little drop clears a small circular area; soon, drop upon drop, the entire dish is cleared of the distasteful intruder.

So, too, with the Penicillin method of decluttering. Today, the declutterer clears the kitchen table. From this point, no matter how bad the clutter becomes elsewhere, the kitchen table is inoculated with Penicillin. Daily clutter checks make sure no clutter is permitted to return.

Next declutter session, the declutterer attacks the top of the buffet. Thinking "Penicillin!", that clear space joins the kitchen table. Soon, the cleared areas link up, banishing clutter from the entire house.

By devoting declutter energies to retaining the Penicillin effect of each declutter session, the Penicillin method focuses the declutterer on prevention. The method is useful, creative, and works well to bring an entire house under control.

Closet-Go-Round: Whole House Declutter
Sometimes, you simply have to re-invent the wheel. Perhaps you realize, three years into a new house, that household storage needs a complete overhaul. Remodeling, a child's departure for college, or birth of a new baby can all signal a need for a whole-house declutter.

Call it the Closet-Go-Round. It's a two-part process of identifying and assigning storage, while at the same time decluttering and revamping existing areas in the home.

Like a merry-go-round, the Closet-Go-Round turns out, sorts out and relocates all the storage functions of the home. In the initial stage, you'll identify storage needs and match them to available storage areas, regardless of what's being stored where at the moment. You can find more complete information on making a household storage plan in our article Store It! The ABCs of Household Storage Plans.

Once you know what should go where, the active phase begins. You will need boxes, lots of them, and time--quite a bit of time. Starting at the front door, move from room to room placing boxes in front of each storage area: cabinets, drawers, closets, and shelves.

Then begin at the beginning once more. Start, for example, at the table in the hall. Remove any and all items from the table that are not assigned there: gloves, mail, keys, change, handbags. Place them in your box.

When the table is empty, except for the vase of flowers that belongs there, circle the house with your catch. Gloves are placed in the box before the coat closet where they are supposed to live. Mail is dumped into the box in front of the desk area. Handbags and change are delivered to the owner's launch pad area (Tame Morning Madness with Launch Pads). Items to be thrown away are delivered to the garbage can.

When the box is empty, move on to the next storage area in the hall: the coat closet. Empty the coat closet of all unassigned items, while adding the gloves to their assigned area. Again, circle the house with your coat closet box, delivering items to the new storage area where each belongs.

As you work, you're sorting and decluttering in two directions. You're removing clutter and improperly-stored items, while collecting and replacing the things which belong in any given area.

A Closet-Go-Round is a big undertaking, and it doesn't work well if performed in fits and starts. Choose this method if you have a block of two or three days to devote to a major declutter. While you'll work hard during that time, a Closet-Go-Round can take giant strides toward a more efficient, easy-to-manage home.

Saturday, March 12, 2011

Decorating a back yard fence: Ideas for your outdoor living space

Whether you are getting your house ready to sell or looking to warm up your back yard living space, there are some cheap and cheerful ways to reenergize your back yard fence.


http://decorateyourfence.com/Ideas-and-Projects.html

Thursday, March 10, 2011

Dude-tastic Man Caves

I would suggest that almost every man has man cave envy at one time or another. Our neighbour and good friend has a man cave garage with a big screen, ping pong table, fridge and cool old cars. It's the garage-mahal.

Check out these dude-tastic man cave from HGTV.


Wednesday, March 09, 2011

Getting ready to sell? Wall Murals are cheap and cheerful

Wall murals start at $35 and can really brighten up a room. Check out some cheap and cheerful designs that can add real wow whether your are selling or staying.

http://www.artapplique.ca/


Monday, March 07, 2011

No Pantry? 8 Tips for Keeping Counters Clutter-Free

Many of us who live in apartments or small houses are pantry-less, which means all of those bags of rice and cans of tomatoes must find a home somewhere. We don't mind leaving small appliances on the counter, but boxes of crackers or canisters of baby munchies are another story. Here's how we stash it all in limited cabinet space.


Here are some tips that help me keep everything under control:

1. Lose the boxes. If something is packaged individually, then in a larger box (like instant oatmeal), take out the packets and put them in a plastic bag. Or just wrap a rubber band around them. If you use half a box of pasta, put the other half in a zip-top bag. It will take up less space and stay fresher, too.

2. Don't overbuy. Simple, but true. Don't buy what you don't need and don't have room to store. That means this is probably out of the question.

3. Look for unlikely storage places. Do you have a couch with a skirt? Store non-perishables under it. Or look for unused nooks in cabinets where you normally store pots and pans or your food processor. If you're afraid you'll forget where things are, make a master list.

4. Use your refrigerator. Canned goods don't need to go in the fridge, but they, ahem, can. If you aren't using all of your shelf space in the fridge, shove some non-perishables in the back.

5. Get a basket. You might already have a fruit basket, but a basket that holds small boxes or bags of grains, cereals, and pasta can also keep your counters looking neat.

6. Leave out the stuff you use often. Don't use precious cabinet space to store your olive oil if you use it every day (yes, it should be in a place that's cool and dark, but if it's a small bottle that you use up fairly quickly, and you can keep it in a dark corner on the counter, it should be fine). I am planning to put the big box of Diamond Crystal Kosher salt on my countertop because I am constantly refilling my salt bowl, it's taking up a lot of cabinet space, and honestly I think it's kind of cool-looking. I'll use that empty shelf space for things I use less often.

7. Toss the old stuff. You likely have things hiding in the back of your cabinets that are past their prime. It stinks to throw away food, but if you'll never use it, toss it. Make room.

8. Don't get frustrated trying to store tonight's dinner. What I mean is: If you come home from the grocery at noon and are making chili at 6 p.m., don't sweat stacking cans of tomatoes and beans in your cabinets. This sounds silly, but I've been there, thinking, "Argh! I can't even put my groceries away!" Only to realize three hours later that I'm using half of them.

And it goes without saying that the more organized your cabinets, the more you can fit in them. Stack neatly and use dividers, racks, and storage boxes to help.

What are your tips for storing pantry items when you don't have a pantry?

Looking for more ideas on storage and design? Check out http://www.thekitchn.com/

Friday, March 04, 2011

TREB: Some home improvements will pay off big

Bill Johnston

SPECIAL TO THE STAR

The Greater Toronto Area’s spring real estate market is just a few week away.

If you’re planning on making a foray into the market this year, now could be the time to undertake improvements, which if carefully planned, can increase the value of your home considerably.

Most of us know that kitchens, bathrooms and a fresh coat of paint inside and out offer the best return on investment. According to the Appraisal Institute of Canada, you can expect to get back 75 to 100 per cent of what you put into kitchens and bathrooms. Painting can return 50 to 100 per cent of your investment.

While these are typically low-risk investments, a number of factors can influence the gains you achieve with other types of renovations. Location is one such consideration. The completion of a basement recreation room, for example, can generally return 50 to 75 per cent of expenses, depending on the preferences of future buyers in your area. In a predominantly seniors community, its value could be considerably limited.

It’s also important to consider your home’s most crucial needs. Window and door replacement may offer a return of 50 to 75 per cent, but if your existing units are broken, this home improvement should take priority on your project list. Where glaring needs are concerned, the value associated with your home’s overall impression outweighs specific project returns.

When deciding whether to proceed with functional renovations though, it’s also important to consider that significant government rebates are available for many energy efficiency improvements.

There are some improvements that we undertake simply for our own enjoyment, like a swimming pool, from which you can get back up to 40 per cent of your investment, or landscaping, which is likely to offer a 25 to 50 per cent return. Despite the limited gains they may offer individually, these types of improvements can also make an important contribution to your property’s overall image.

Consider as well that not all of your renovations need to be sizable. Even minor improvements like new light fixtures, cabinet hardware or faucets can give your home a contemporary look

Wednesday, March 02, 2011

Inspiration: Unconventional Headboards

Thinking of refreshing the look of your bedroom? Here are some great ideas for headboards

http://www.apartmenttherapy.com/

As the focal point of most bedrooms, the headboard is a feature in which there lies opportunity to think outside the box. From fashionable wall decals to reclaimed window frames, check out these eight great rooms with novel bed-heads.


Sunday, February 06, 2011

Toronto Real Estate: Prices up in January 2011

It's always interesting to watch the start of the spring real estate market in Toronto. Technically the spring market runs January thru the end of May however the market heating up seems to depend a lot on the thermometer.

In colder years with lots of snow, the market starts slow as no one like slogging through adverse weather conditions to look for a house. As a result there may be a back log of buyers with no product (houses) to buy. That can contribute to bidding wars once the weather cooperates and the first round of houses goes up for sale.

Some sellers may sit back and wait hoping to capitalize on the buying frenzy. This may work for some but your timing has to be absolutely perfect. If you wait too long, you could miss out. If you list to early, there may not be enough buyers ready to pull the trigger as they wait for more product to be available.

Strategy and Tactics
Here are some best practices suggestions:

1) If you are thinking of listing, talk to your realtor and make a list of items to fix, paint, plant, decorate or declutter

2) Start working on the list now so that should you decide to list, you are ready to come out of the gate absolutely ready

3) Don't spend money on fixes that won't net you your money back out.

We have been seeing a trend in the past 6 months of real estate transactions being down and housing price up. Worth considering if you are looking to sell.

Friday, December 31, 2010

Toronto Real Estate: Getting Your House Ready to Sell

Selling your house in any real estate market takes a lot of planning. In a balanced market, buyers will be picky, so planning well is important before you put your house on the market. The three major considerations a seller needs to understand are how to get your home in its best condition, both inside and out, and how to price the home effectively.

Lots of sellers can get overwhelmed with what it takes to get their home ready to sell. I've seen homeowners who do the least possible and I've seen those that break the bank in over-improvements that don't pay off. Somewhere in the middle is where most successful sellers end up. Before dropping a bundle into repairs and renovations that might or might not pay off, a seller would be wise to do their research. First, a home needs to be in keeping with the neighborhood standard to compete in the local market. If the average home in your price-range and area doesn't have a lot of expensive upgrades, like granite countertops and high-end appliances, then you'd be wasting your money to do a lot of high-end upgrades. You won't get a good return on your investment. Vice-versa, if you skimp on the upgrades that every house around you has, your neighbors will appreciate you for helping them to sell their house before yours. You can skimp, but just don't expect to get the same amount for your home.

A lot of energy is spent on research about what buyers are looking for these days. Realtor Magazine published a recent article listing the top ten wish-list of today's buyers:
1. Large kitchens with islands
2. Energy efficiency, including energy-efficient appliances, super insulation, and high-efficiency windows.
3. Home offices
4. Main-floor master suite
5. Outdoor living space
6. Ceiling fans
7. Soaking tub in the master suite and/or an oversize shower with a seating area
8. Stone and brick exteriors rather than stucco or vinyl
9. Community walking paths and playgrounds
10. Two-car garages, but three-car garages are even more desirable

If you have any of these features in your home, emphasize them in your marketing. If you don't have some of these features, don't sweat it, this is a "wish-list", just keep emphasizing the positives. Don't spend a lot of time and money creating something that's not there, spend your time and efforts making what you have look its best.

Outside the House - Curb Appeal

Sometimes sellers grow accustomed to the look of their homes. It can be helpful to have another opinion when trying to decide what projects to take on and how much work is needed when the subject of curb appeal comes up.
The psychology behind great curb appeal is really pretty simple. As a seller, you want your home to be attractive, appealing, and welcoming. Most of the time, achieving that can be very simple. You want to accentuate positives and minimize negatives. The negatives you want to minimize are also simple: You don't want the buyer to say to themselves, There's one more thing I'm going to have to do if I buy this house." That's a comment a seller never wants to generate from the buyer. They should rather hear, "I love this house, I could just move right in!"

So how do you get that kind of comment? Five basic steps.

1. Clean up and declutter. Most of the work is usually in this category.
• Trim back trees, bushes, sidewalk edges and thin out overgrown beds. (Think of it as a haircut, although more of a trim, not a drastic head-shave:) You don't want the buyer to say, wow, I'm going to have to trim all this back when I move in.
• Rent, borrow or buy a power washer and clean up sidewalks, porches, decks and siding. You'll be amazed at what a difference a clean surface makes.
• Make sure the grass stays mowed while your home is on the market.
• A fresh coat of paint or stain. Any wood should be freshly cleaned and stained. Again, the buyer will notice and count it as a positive that they won't have to add it to their list of things to do after moving in. As this list grows, so does the dollar amount a buyer subtracts from their offer!
• The front door and trim is a first impression. You want it to say, The owners love this house and take good care of it."
• The door handle and lighting should be newer and in keeping with the style of the house. Don't be afraid to light up the entryway for those night-time showings.
2. Make your porch inviting. Muskoka Chairs or wicker - create an outdoor living area.
3. Create a focal point at the front door. If you have room for seating, add a cozy chair or a bench. Add a wreath of flowers on the door. The idea is to create a sense of welcome.
4. Add color with flowers. If you don't have space to plant some annuals, then put out pots of colorful flowers around the entryway. Colorful flowers are a delight to the eyes and senses, and they say a big "Hello".
5.Repair any problems with driveways, sidewalks or brick or stone edging. Patch and seal for a finished look.

None of these projects have to be expensive and exhausting. They just take a little elbow grease. And make sure you don't overdo the colors or the flowers, you don't want to overwhelm your visitors, you just want to make them feel welcome. Welcome enough to want to stay!

Inside the Home - Staging

You can find great staging tips all over the internet, but the real value is in getting an understanding of the mind of a buyer. Seeing through their eyes will be very helpful to you when you are staging your Frederick home for sale.

Sellers need to realize that the best-looking and best-priced homes are the ones that will sell. It's really that simple. Your home must look the best it can. You have to be vigilant about Dirt and Clutter.

When buyers see dirt, the natural assumption is, "If they can't clean their house for a showing, I wonder what other deferred maintenance issues I might have to deal with?" In their mind, a dirty house is not a house that has been cared for. A note to pet owners: some folks are allergic, so you have to do everything you can to minimize pet dander or better yet send your beloved pet for a mini vacation while you are trying to sell.

Clutter is also something that absolutely must be tackled. Buyers have a hard time seeing themselves and their stuff in your house, if they can't see past the clutter. Clutter also makes the space look smaller than it is. Here's my thought: You're moving anyway, so why not pack up most of your stuff and live lightly for a few weeks?

As a seller, you are trying to throw as wide a net as possible, and appeal to as many buyers as you can. That is the psychology behind neutralizing and de-personalizing your decor. Not to the point of boring, but to the point of tasteful and neutral. You have to change your thinking from "this house;is my home and hearth", to "this house is a commodity that I am trying to sell."

1. Assume that buyers have no imagination. They can't see past the gold velvet drapes in the dining room. Sure they looked great with your Queen Anne dining set, but most buyers probably don't have your exact set. The average buyer is 30 years old. They probably like Pottery Barn or even Ikea, who knows. The point is, they have to see themselves in your home.
2. If you have some great features, don't be shy about highlighting them, especially if they were the features that sold you on the house. Do you have a great view? Then open the window coverings, and orient the furniture to emphasize the view. Do you have a hot tub? By all means, turn it on, uncover it and put out the margarita glasses. Suggest to buyers how they will enjoy your home. Do you have a gorgeous master bath? Put out the candles and Champaign glasses and suggest romance to your buyers. Remember, you're assuming that they have no imagination, so you need to give them every reason to love your home.
3. For so many years, we've watched buyers in the decision-making process. No matter how analytical they are when they start the process, eventually, they make decisions based largely on emotion. They connect emotionally with a house and they start to see themselves making it their home. Find ways to stage your home so that you Accentuate the Positive and Minimize the Negative. Help buyers fall in love with your home.

The Spring and Fall Market is an ideal time to sell as buyers catch real estate fever!